We have recently refreshed our branding across our offerings and changed the names of our pricing plans. If you have signed up before Aug 9, 2021, please click Previous plans to view your applicable plans.
We assure you that this change will not impact your product experience, and no action is required on your part.
TABLE OF CONTENTS
- Integrating Freshchat with Freddy Self-service
- Filling in the fields on the configuration page
- Testing and embedding the widget
Note: Ensure that both accounts are in the same Data Center (DC) before configuring the integration.Integrating Freshchat with Freddy Self-service
- Click on Settings > Channels & integrations > Freshchat . You’ll see two options for the integration:
- Bot widget + Live agent assist: which will use the Freddy Self-service bot widget and assign conversations to agents. Learn more here.
- Freshchat + Live agent assist: which will use the Freshchat widget to assign conversations to agents. Read on to learn more.
You can refer to this solution article to understand the differences between the two choices.- Click on New integration and you will see the following fields to link one of your bots to your Freshchat account.

- The association is at a bot level, and not at an account level. Multiple bots cannot be connected to the same Freshchat account. If you would like to create different bot flows for different topics in Freshchat you can check the channel id from which the message is coming from and then trigger an appropriate flow. Learn more here.
Filling in the fields on the configuration page
- Choose the bot which you want to show to your customers with your Freshchat widget. To set up some of the following fields, you’ll have to be logged in to your Freshchat account.
- App ID: Login to your Freshchat account > navigate to Settings > Account Settings > Integration settings > and copy the app ID. Paste this in the App ID field.

- API token: Login to your Freshchat account > Settings > API Tokens > click on the Generate token button, or copy an existing token. Paste this in the API token field.

- User ID: will be used when the conversation is transferred to an agent. The agent is identified using the user ID. This value can be fetched using an API call. Use the Freshchat APIs to make a get call, using the API token as an authentication method to get the ID of an account admin or an owner. Paste this in the user ID field. Learn more about using the retrieve agent information API here.
- Customer meta: is used to pass information about your customers to Freshchat . Any context that the bot is collecting over the course of the conversation can be passed as properties to Freshchat that can, in turn, dictate assignment rules and people segmentation. User properties in Freshchat are what we refer to as customer meta labels in Freddy Self-service. Here, you can fill with template variables or with static values, and that will be used to update the user properties.
[{
"name": "propertyName",
"value": "propertyValue"
}, {
"name": "propertyName",
"value": "propertyValue"
}, {
"name": "propertyName",
"value": "propertyValue"
}]
Configuring Freshchat 's side of the integration
- Go to Freshchat settings > Webhooks > Enable > enter the webhook endpoint in URL format based on your region > Save.

India DC: https://api.in-freshbots.ai/api/freshchat/byob/chat
Europe DC: https://api.euc-freshbots.ai/api/freshchat/byob/chat
US DC: https://api.freshbots.ai/api/freshchat/byob/chat
Australia DC: https://api.au-freshbots.ai/api/freshchat/byob/chat
Triggering the bot on your Freshchat account
When your customer reaches out via the Freshchat widget, the bot will start looking for a matching intent. There can be three ways for this interaction to start:
- Your customer might start with a greeting, which is then matched with the Hello flow.
- You can choose to map the conversation (based on the keywords your customers use) to a different intent — such as a flow name of any answers that you've set up.
- If the bot is unable to match the conversation based on the intent, it will instead trigger the Sorry flow. To make the customer experience is seamless, you can mark the first dialog in the “Sorry” flow private and then connect the “Sorry” flow to the first dialog in the “Hello” flow or to a different flow that you have set up.

Transferring conversation to an agent
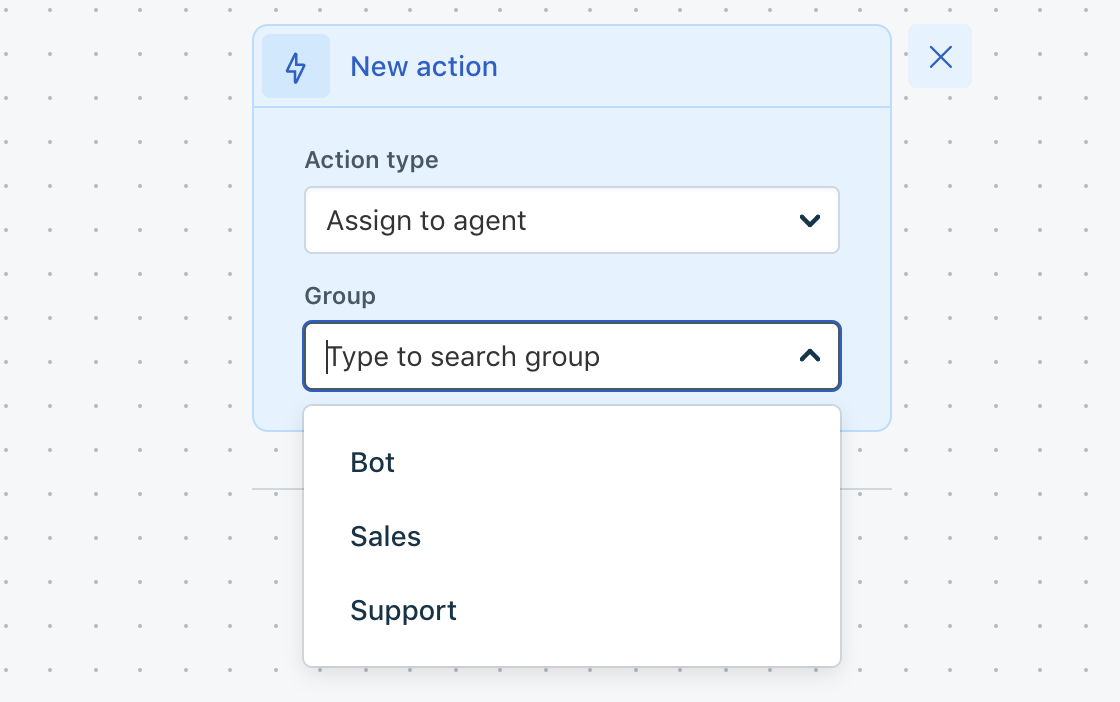
Open the dialog where the handover should happen > Actions > Assign to agent > pick the Freshchat group to which the chat needs to be assigned

- You can also choose to resolve the conversation by picking Actions > Resolve conversation, which will resolve the conversation

Testing and embedding the widget
- Login to Freshchat > Settings > web messenger > copy the code snippet > use a JS simulator, like js.do or jsfiddle.net, to ensure the code runs as expected.
Please write to freshbots-support@freshworks.com if you have any more questions, we'll be happy to help you.